ErgoDox EZ Trackball Mod
Introduction
Recently I purchased an ErgoDox EZ ergonomic keyboard. I figured if I’m going to spend all my time at the computer, might as well save my wrists. I was also excited about the open source nature of the ErgoDox and the rave reviews. I have a friend who’s used one for years and loves it. I almost purchased the new Moonlander, but there weren’t enough reviews yet, so I went with the EZ.
After using the EZ for a bit I was still unhappy with how often my hand was leaving the keyboard for the mouse. A lot of applications have decent keyboard shortcuts and using something like Vimium helps, but can’t beat a mouse for some tasks. I wanted a way to integrate a trackpad or trackball into the EZ. I went searching around for small trackballs and trackapd breakout boards that might be usable and stumbled upon the Pimoroni trackball breakout board. There were some others but this one looked the smallest and easiest to use.
Originally I was going to use a Raspberry Pi Zero to act like a mouse because it supports gadget mode which uses the Linux gadget mode support to emulate a USB device. This means you could use the pi to relay the trackball events over USB and act like a normal mouse. Then the trackball could be attached somewhere on the ErgoDox and be a nice mouse addon. Only downside is the mouse is not really integrated and would take two USB slots to use. Thankfully doing some more searching I stumbled upon this Reddit post where a user drashna had done a similar mod with the same trackball!.
This was fantastic news, and reading the thread drashna explains that the TRRS jack of the ErgoDox is an I2C Bus and since the trackball is also an I2C device you can solder some wires onto the appropriate jack locations and get the trackball talking on the bus! Even better was drashna had already implemented a driver for it in the ErgoDox firmware, which can be found here: drashna trackball code
Steps
Schematic
Here’s the basic steps:
- Find the schematic for the ErgoDox EZ so we can look at the TRRS jack connections: ErgoDox EZ Right Half Schematic Link
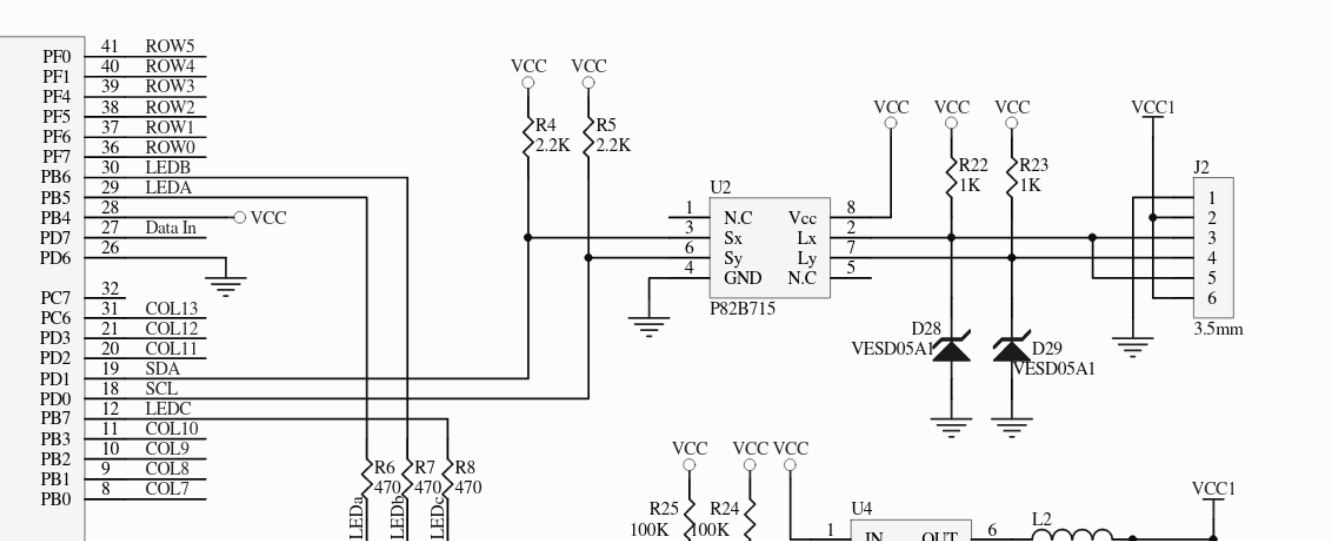
In this image you can see the TRRS jack on the right with pins 1-6. We see that
pin 1 - Ground
pin 2 & 6 - VCC
pin 3 & 5 - Connected to Lx -> Sx -> SDA
pin 4 - Connected to Ly -> Sy -> SCL
The important ones are pins 1, 2, 3, 4 as we’ll see when we look at the Pimoroni schematic.
PCB
- Now we can take a look at the physical board and a schematic of the TRRS jack to figure out which solder joints we can co-opt for our trackball:
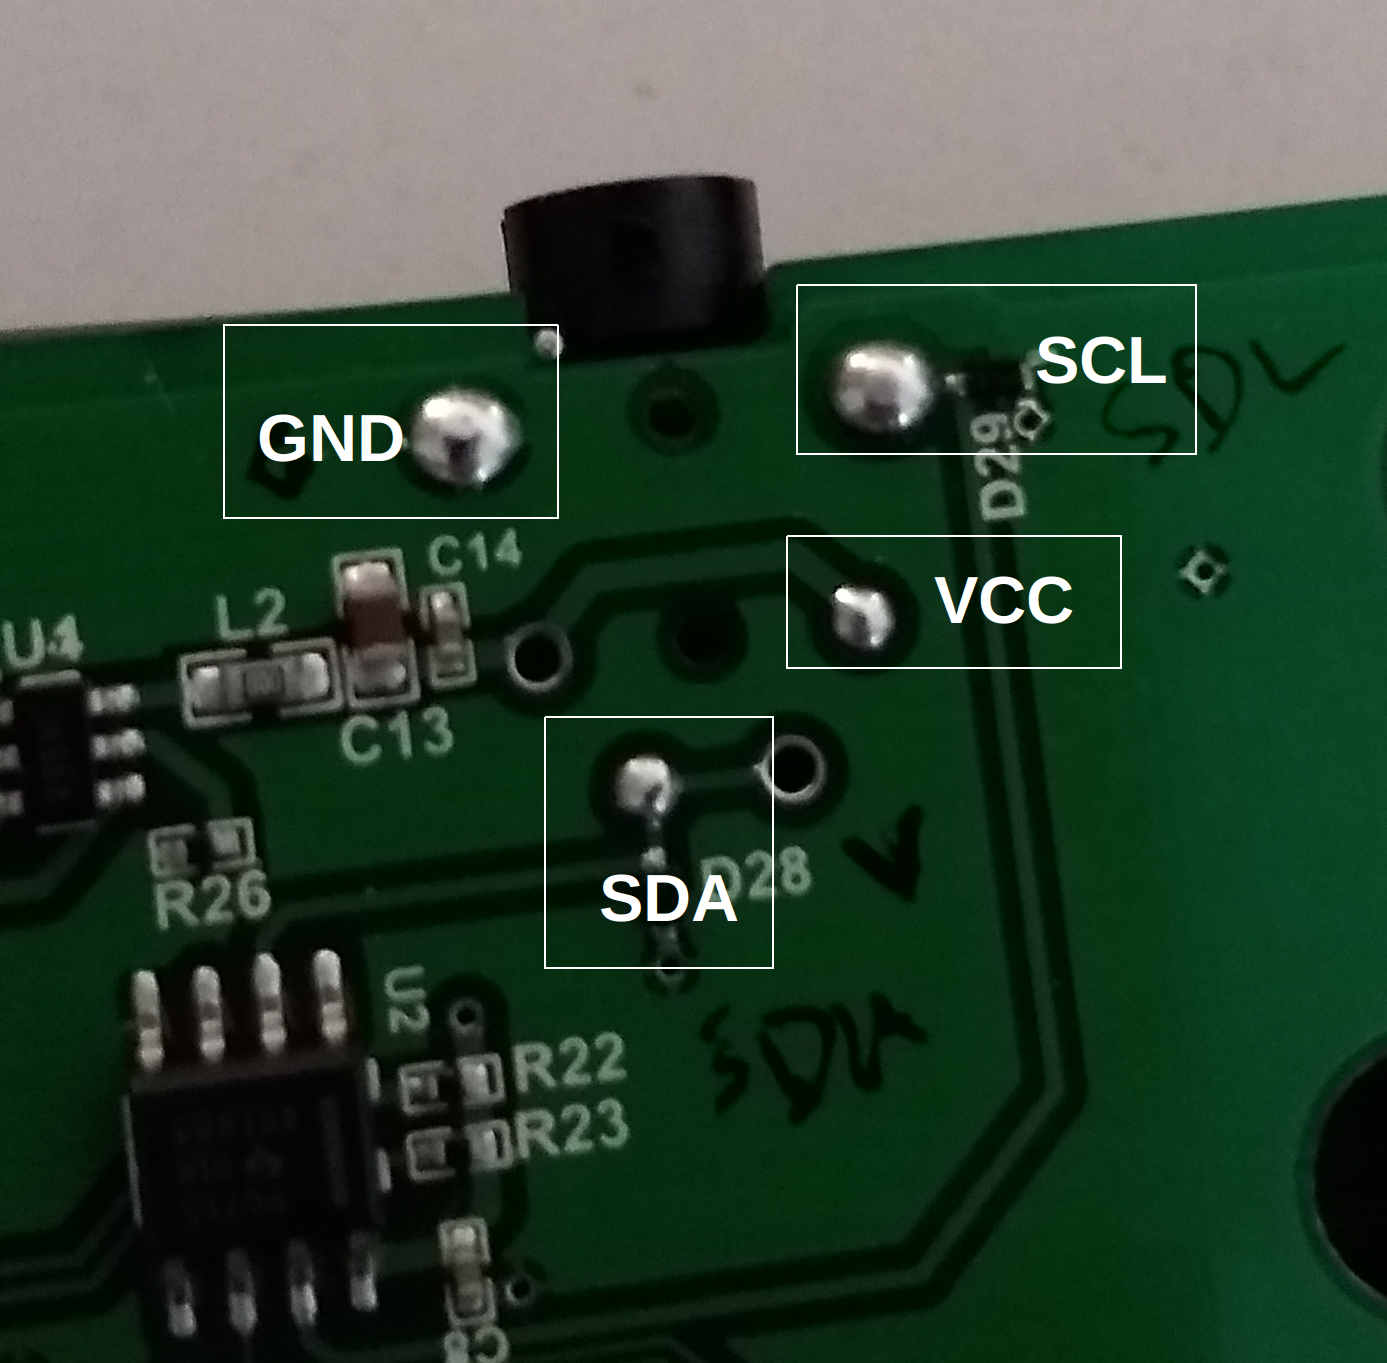
I’ve labeled the joints on the jack that we can use for our trackball. This can be found out by finding the TRRS jacked used in the ErgoDox EZ: See section 2.1.0.2 and we find the part is CP-43514 which has the datasheet that shows the pinout connections:
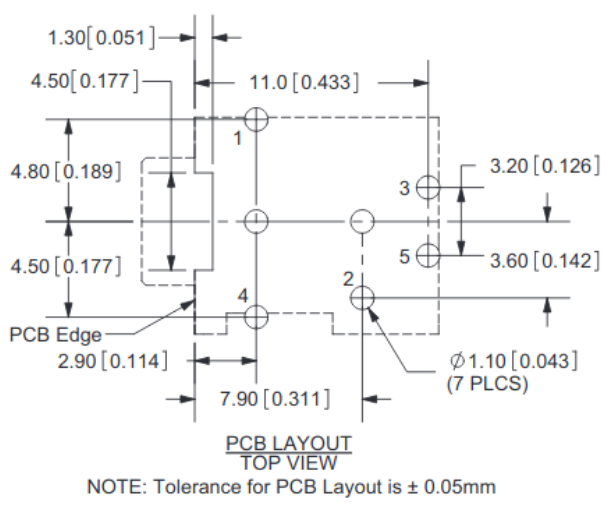
Remember that this is a top-down view and the PCB is a bottom-up view, so the pins are actually mirrored. Comparing the ErgoDox EZ schematic with the physical PCB and datasheet we arrive at the pin uses listed earlier.
Trackball
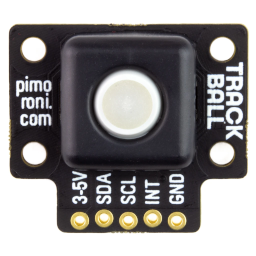
- Now that we know what to hook up its a simple matter of wiring the Pimoroni pins to the proper locations on the ErgoDox EZ jack. Unfortunately I don’t have a picture of my solder job as I forgot to take it before putting the case together.
Result
- Here’s what mine looks like after reassembling the case:
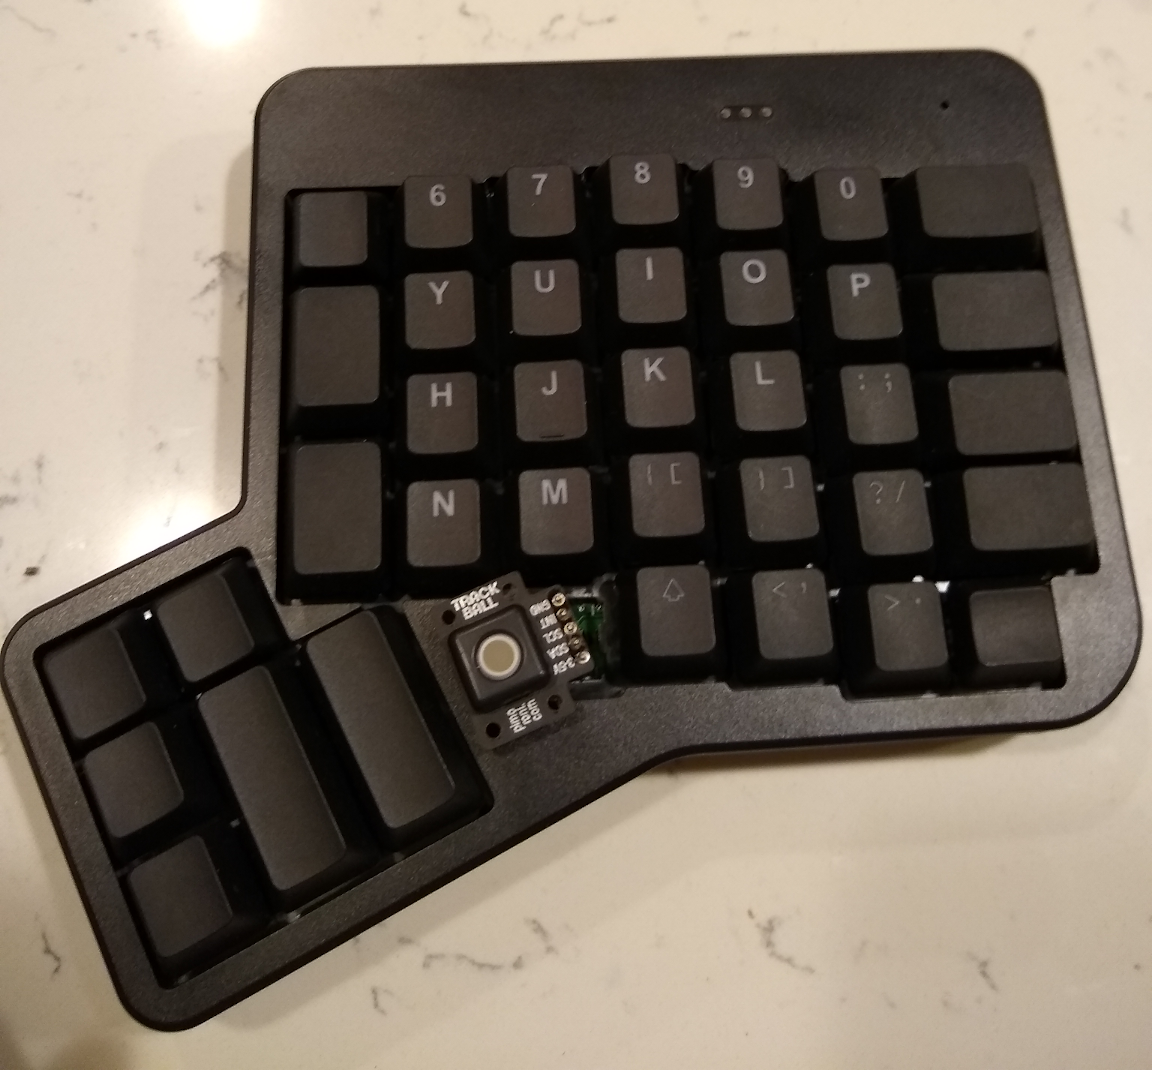
I decided to forgo one key near the thumb for better mouse placement, as I figured I’d be using the trackball a lot. I also debated drilling some holes and having the mouse hang off the bottom fo the ErgoDox a bit so that I could keep the full keyset, but that required more commitment than I was willing to do for the moment, maybe in the future!
Final Remarks
I’ve modified drashna’s original code quite a bit, and hopefully improved upon the mouse behavior. One of the tricky things about the trackball is it’s very small, so it makes it difficult to get the right sensitivity at the right time. When clicking small UI elements like the X button you want precision, but other times you need to get the mouse to the other side of the screen and don’t want to be flicking your thumb 20 times. I’m still tweaking the code, but I’ve settled on something that seems to work okay for now. The gist is:
- Use an exponential acceleration
- Tier the acceleration to different ranges, so when the trackball returns small values assume the user is trying to be precise and don’t over-accelerate
- if the values are in the middle apply a bit more of a multiplier to get the mouse moving more
- if it’s a high value assume the user did a giant flick to get across the screen
This seems to trick a decent balance, although getting the number ranges correct is a bit tricky. I’m sure there’s smarter solutions to this problem, but this seems to work for now…
A couple extras I added are:
- Add a “please accelerate a lot right now” button that bumps the multiplier to a high value without trying to be smart
- Scroll mode (although drashna already had this) that’s dampened a bit, seems to be nicer scrolling on web
- Add support for left/middle/right click/release. The normal ErgoDox mouse bindings seem to send a full mouse click on key press. I wanted something that would simulate a normal mouse button where the release didn’t happen until the key was released. These are custom key codes that are sent with the mouse message.
Code
I’ve uploaded the modified firmware files here. It’s not the best code, but it works! It may require some tweaking for your particular setup. A lot of the acceleration/multipliers depend on how far you tend to flick your thumb. Also, this would be the perfect time to show a video, unfortunately I’m still new to the ErgoDox and the video would be me fumbling around trying to remember my key bindings. So maybe sometime in the future!